
Cooking the perfect steak is both an art and a science. Whether you prefer your steak rare, medium, or well-done, mastering a few key techniques—searing, resting, and seasoning—can take your steak from average to restaurant-quality.
In this guide, we’ll break down each step, from choosing the right cut to achieving a flavorful crust and juicy interior. By the end, you’ll have all the knowledge needed to cook a steak that’s tender, flavorful, and perfectly cooked every time.
Let’s dive in!
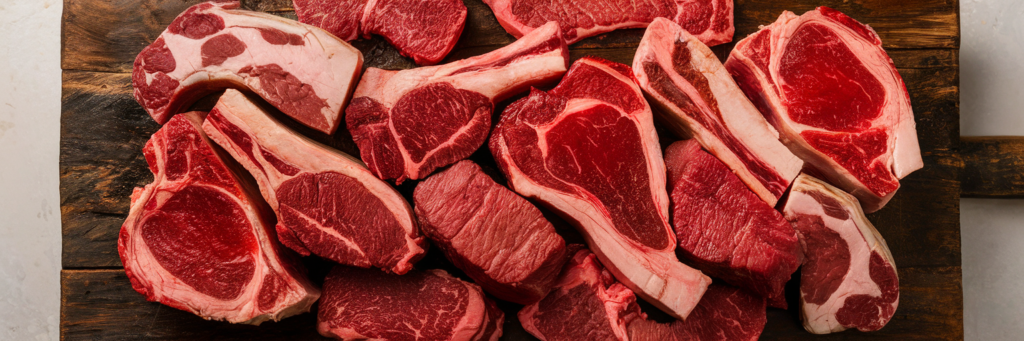
1. Choosing the Right Steak
Before you start cooking, selecting the right cut of steak is crucial. The cut, thickness, and marbling all play a role in how your steak will taste and cook.
1. Best Cuts for Searing
- Ribeye – Rich in marbling, making it flavorful and juicy.
- New York Strip – A balance of tenderness and beefy flavor.
- Filet Mignon – Extremely tender but leaner than other cuts.
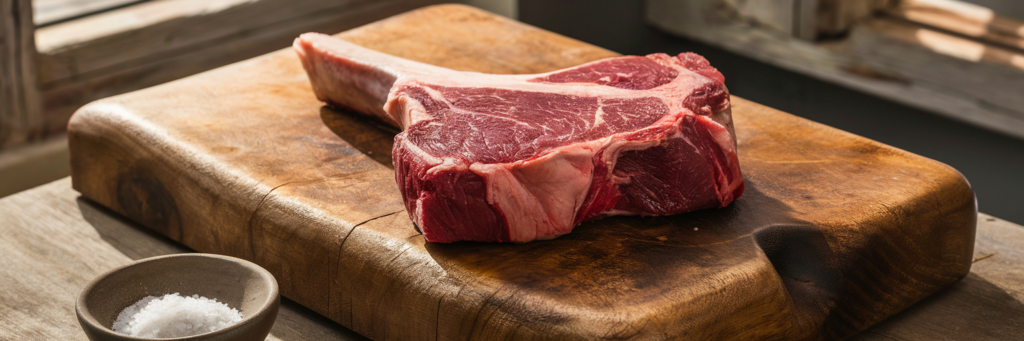
- T-Bone / Porterhouse – A combination of tenderloin and strip steak, great for those who love variety.
- Sirloin – A more affordable cut with good flavor, best when cooked to medium or less.
2. Thickness Matters
- Choose steaks that are at least 1 to 1.5 inches thick to allow a perfect sear without overcooking the inside.
- Thinner steaks cook quickly and are harder to control, while thicker steaks are ideal for achieving a great crust with a juicy center.
3. Understanding Marbling and Meat Quality
- Marbling (thin streaks of fat within the meat) adds flavor and keeps the steak moist while cooking.
- Look for USDA Prime or Choice beef for higher-quality steaks. Grass-fed beef tends to be leaner, while grain-fed beef has more marbling.
By selecting the right cut, thickness, and quality, you’re setting yourself up for success in cooking the perfect steak.
2. Preparing the Steak for Cooking
Before you start cooking, proper preparation is key to achieving a flavorful and evenly cooked steak. Follow these steps to ensure your steak is ready for the pan.
1. Bring the Steak to Room Temperature
- Cooking a cold steak straight from the fridge can lead to uneven cooking, with the outside overcooked while the inside remains too raw.
- Solution: Let your steak sit at room temperature for 30–45 minutes before cooking, depending on its thickness.
2. Pat the Steak Dry
- Excess moisture prevents a proper sear and can cause steaming instead.
- Solution: Use a paper towel to thoroughly pat the steak dry on both sides before seasoning.
3. Seasoning Before Cooking
- Salt: Use coarse salt (like kosher or sea salt) to enhance flavor and draw out moisture for a better crust.
- Pepper: Freshly ground black pepper adds a mild spice and depth.
- Timing: For best results, salt the steak at least 40 minutes before cooking or right before searing to avoid drawing out too much moisture.
4. Optional Enhancements
- Dry Brining: For extra flavor, sprinkle salt on the steak and refrigerate it uncovered overnight. This helps improve texture and deepens the taste.
- Additional Seasonings: While salt and pepper are classic, you can add garlic powder, smoked paprika, or a light sprinkle of steak seasoning if desired.
By properly preparing your steak, you set the foundation for a perfect sear, rich flavor, and a juicy, tender bite.
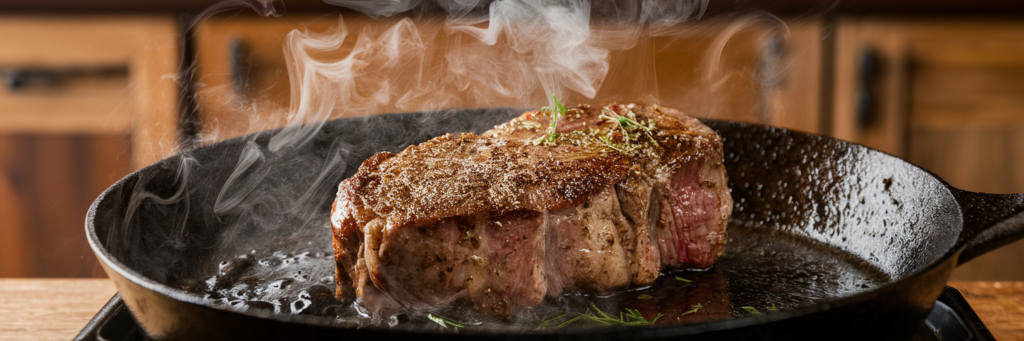
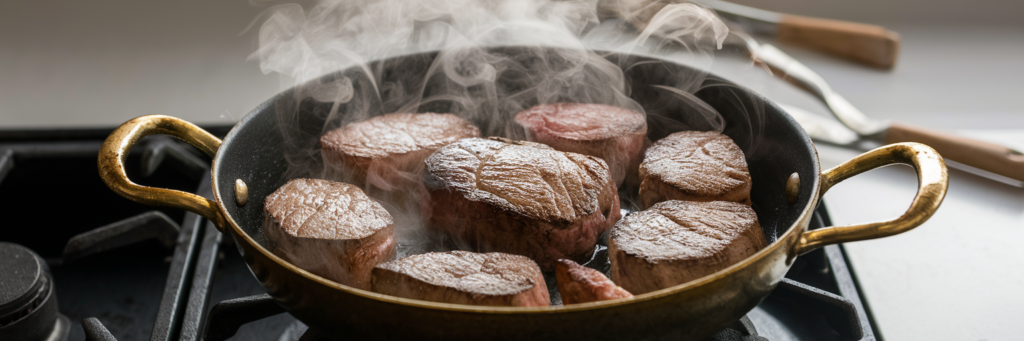
3. Searing the Steak
Searing is the key to developing a rich, flavorful crust while keeping the inside juicy. This step requires proper heat control, the right oil, and the right technique.
1. Preheat the Pan
- Use a heavy-duty pan like cast iron or stainless steel for even heat distribution.
- Preheat the pan over medium-high to high heat for at least 5 minutes until it’s hot enough to sear instantly when the steak touches the surface.
2. Choose the Right Oil
- Use an oil with a high smoke point to avoid burning. Best options include:
- Avocado oil
- Canola oil
- Grapeseed oil
- Clarified butter (ghee) for a richer flavor
3. Sear the Steak Properly
- Step 1: Add a small amount of oil to the hot pan and swirl to coat.
- Step 2: Place the steak in the pan away from you to prevent oil splatter.
- Step 3: Do not move the steak for at least 2–3 minutes to develop a deep, golden-brown crust.
- Step 4: Flip the steak and repeat on the other side.
- Step 5 (Optional): For extra flavor, add butter, garlic, and fresh herbs (like rosemary or thyme) in the last minute, basting the steak with melted butter.
4. Use a Meat Thermometer for Precision
To achieve the perfect doneness:
- Rare: 120–125°F (Cool red center)
- Medium-Rare: 130–135°F (Warm red center)
- Medium: 140–145°F (Warm pink center)
- Medium-Well: 150–155°F (Slight pink center)
- Well-Done: 160°F+ (No pink)
By following these searing techniques, you’ll get a restaurant-quality crust with a tender, juicy inside.
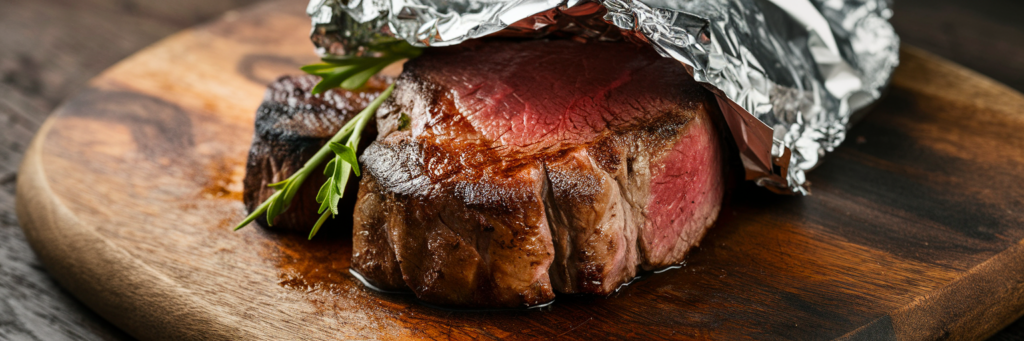
4. Resting the Steak
Resting the steak after cooking is just as important as searing. This crucial step ensures the steak remains juicy, tender, and flavorful instead of losing moisture when cut.
1. Why Resting is Important
- When the steak is cooked, the juices inside are concentrated in the center due to heat.
- Cutting too soon will cause these juices to spill out, leaving the steak dry.
- Resting allows the juices to redistribute evenly throughout the meat, keeping it moist.
2. How Long Should You Rest a Steak?
- The general rule: Rest for at least 5–10 minutes before slicing.
- For thicker cuts (like ribeye or porterhouse), rest 10–15 minutes for better juice retention.
- A simple guideline: Rest for half the time you cooked it.
3. Should You Cover the Steak While Resting?
- Loosely cover the steak with foil to keep it warm, but avoid sealing it tightly to prevent steaming and softening the crust.
4. Carryover Cooking Effect
- The steak continues cooking as it rests, increasing the internal temperature by 5–10°F.
- If you want medium-rare (130–135°F), remove it from the pan at 125°F.
By allowing the steak to rest properly, you ensure every bite is juicy, flavorful, and perfectly tender.
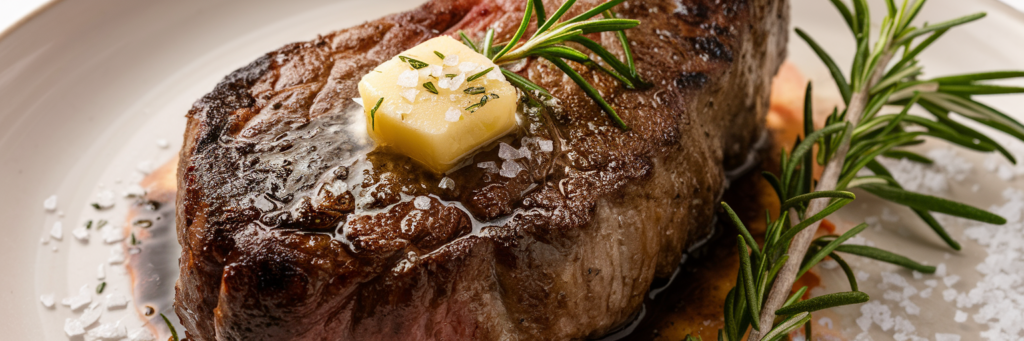
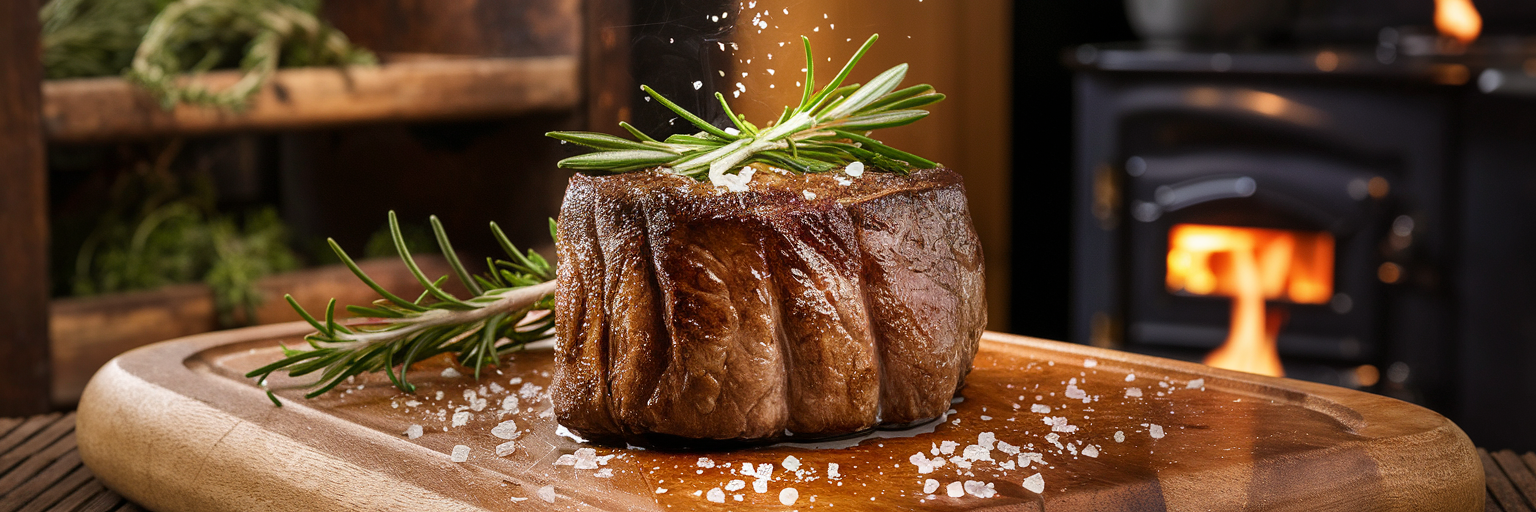
5. Seasoning After Cooking
While seasoning before cooking enhances flavor, adding finishing touches after cooking elevates your steak to the next level. This step enhances taste, texture, and presentation.
1. Adjusting Seasoning After Cooking
- After resting, sprinkle a final touch of salt (like flaky sea salt) to enhance flavor and texture.
- Freshly ground black pepper adds a warm, slightly spicy depth to the steak.
2. Adding Butter for Extra Flavor
- A pat of butter on top of the hot steak melts into a rich, glossy finish.
- For even more flavor, try compound butter (butter mixed with garlic, herbs, or spices).
- Common compound butter flavors:
- Garlic & Herb Butter (butter, garlic, parsley, rosemary)
- Blue Cheese Butter (butter, blue cheese, chives)
- Spicy Butter (butter, chili flakes, smoked paprika)
3. Fresh Herbs & Aromatics
- Chopped fresh herbs like rosemary, thyme, or parsley brighten the steak’s flavor.
- A squeeze of lemon juice can balance the richness of the meat.
4. Optional Sauces for Extra Depth
- While a perfectly cooked steak doesn’t need sauce, you can add:
- Chimichurri – A fresh, herby sauce with garlic and olive oil.
- Peppercorn Sauce – A creamy, slightly spicy sauce.
- Béarnaise Sauce – A buttery, tangy French classic.
With these finishing touches, your steak will have incredible depth of flavor, making it even more irresistible!
6. Common Mistakes to Avoid
Even with the right techniques, simple mistakes can ruin a perfectly good steak. Here are some of the most common errors and how to avoid them.
1. Cooking a Cold Steak
- Mistake: Taking the steak straight from the fridge to the pan.
- Why It’s Bad: Leads to uneven cooking—overcooked outside, undercooked inside.
- Fix: Let the steak sit at room temperature for 30–45 minutes before cooking.
2. Not Drying the Steak Before Searing
- Mistake: Cooking a wet or damp steak.
- Why It’s Bad: Moisture prevents proper browning, leading to steaming instead of searing.
- Fix: Pat the steak dry with a paper towel before seasoning.
3. Overcrowding the Pan
- Mistake: Cooking multiple steaks in a small pan.
- Why It’s Bad: Lowers the pan’s temperature, preventing a good crust.
- Fix: Cook steaks one at a time or use a large pan with space between them.
4. Flipping Too Often
- Mistake: Constantly flipping the steak.
- Why It’s Bad: Prevents a proper crust from forming.
- Fix: Flip only once when the first side has a deep, golden-brown crust (about 2–3 minutes).
5. Cutting the Steak Too Soon
- Mistake: Slicing the steak immediately after cooking.
- Why It’s Bad: Juices will spill out, leaving the steak dry.
- Fix: Let it rest for 5–10 minutes to allow the juices to redistribute.
6. Using the Wrong Type of Oil
- Mistake: Cooking with butter or olive oil from the start.
- Why It’s Bad: These have low smoke points and can burn.
- Fix: Use high-smoke-point oils like avocado, canola, or grapeseed oil for searing, and add butter at the end.
7. Not Using a Meat Thermometer
- Mistake: Guessing the doneness instead of checking.
- Why It’s Bad: You might end up with an overcooked or undercooked steak.
- Fix: Use a meat thermometer to get the perfect temperature (e.g., 130°F for medium-rare).
Avoiding these common mistakes will ensure your steak turns out flavorful, juicy, and perfectly cooked every time!
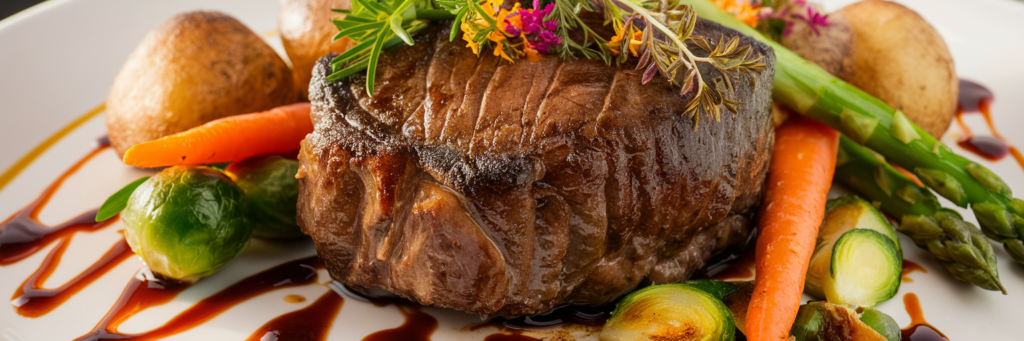
Conclusion
Cooking the perfect steak is a balance of technique, patience, and attention to detail. By mastering the essential steps—choosing the right cut, proper preparation, searing, resting, and finishing with seasoning—you can achieve a steakhouse-quality result at home.
Key Takeaways:
- Select a high-quality cut with good marbling and at least 1-inch thickness.
- Bring the steak to room temperature and pat it dry before cooking.
- Sear at high heat to develop a flavorful crust.
- Let the steak rest for 5–10 minutes to keep it juicy.
- Add final seasonings like flaky salt, butter, or fresh herbs for extra flavor.
- Avoid common mistakes like flipping too often or cutting too soon.
By following these steps, you’ll be able to cook a perfectly seared, tender, and delicious steak every time. Now, grab your pan, fire up the stove, and enjoy the steak of your dreams!


We’d love to hear from you! Share your thoughts, comments, and feedback with us, we’re always looking to improve and grow. Let us know what you think!